Surface drip tape evaluation
Surface drip tape systems have the drip tape on the soil surface or with just enough of a soil cover over the tape to protect it from the wind and sun. You generally have good access to the exposed drip tape laterals, so pressure and discharge measurements are relatively easy to take.
Two types of drip tape products are available. One type is pressure compensating (PC), which means that once the system reaches a threshold pressure, water will discharges at a constant rate regardless of the pressure variations beyond that threshold. The most commonly used type of drip tape, though, is not pressure compensating (NPC). Water discharge rate from these tapes vary with changes in pressure.
Surface drip tape systems allow you easy access to the entire drip tape, making the system easier to evaluate than a subsurface drip system with buried lateral lines. Direct drip tape discharge measurement provides the best evaluation information, but the data are difficult and time-consuming to gather, even with the drip tape exposed. For that reason, pressure measurements and flow meter measurements are often gathered for use in evaluating surface drip tape systems.
Pressure measurements

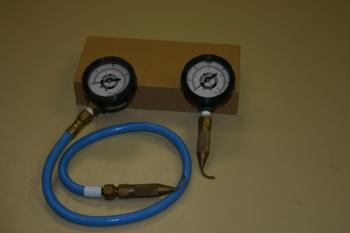
If the head or tail ends of the drip tape laterals are exposed, you should take numerous pressure measurements at those exposed locations. A 0 to 30 psi liquid-filled or digital pressure gauge is best. Make sure to fit it with the appropriate drip fittings or a pitot tube (see photo) to gather pressure measurements. The pressure gauge-drip fitting combination is used if a drip fitting in the drip tape SDI system can be disconnected and the pressure gauge connected for a temporary pressure measurement. A pressure gauge and pitot tube system is used if there is a section of drip tubing (usually at the head of the lateral line) where you can punch a hole using a drip emitter punch and insert the pitot tube for a pressure measurement, after which you need to plug the hole with a "goof plug."

The drip tape lateral ends may be exposed if they are to be flushed by hand. This is an excellent pace for taking pressure measurements.
Taking additional pressure measurements in the submain or mainline system may not be possible if they are below ground. If you use layflat or oval tubing, it is possible to take pressure measurements from that, but pressure measurements taken at the head of drip tape lateral lines give nearly the same pressure readings and may be more easy to collect.
Pressure measurements that compare the pressures at the head and tail ends of the drip tape laterals are important. Also important are pressure measurements from any areas where the elevation is changing. Field-gathered pressure measurements can be indicators of tape discharge variability. This is particularly true for the non-pressure-compensating (NPC) drip tape products. Assuming no clogging problems, tape discharge can be calculated from pressure measurements if the drip tape manufacturer’s technical information is available. This is helpful since pressure measurements from drip tape products are often easier to gather than are direct measurements of drip tape discharge.
For more information on How to use drip tape pressure and discharge rate measurements, click here.
Discharge rate measurements
Flow meters
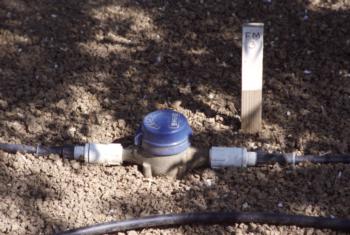
Two flow meter options are available for measuring discharge rates in the drip tape laterals. First, a single flow meter installed at the head of the system can measure the total flow. If pressure is held constant, changes in this flow rate over time (Daily, weekly, monthly) can provide important information. For example, an increase in flow rate may indicate leaks in the system. A decrease in flow rate may indicate clogging. One disadvantage of using a single flow meter is that if there is an indication of a problem, the meter gives you no information about where in the system the problem is located.

Direct discharge rate measurements
For surface drip tape systems, it is possible to directly measure the drip tape discharge. It is difficult to isolate and measure the discharge from a single discharge point; measuring the discharge from a section of drip tape provides more reliable information. One way of doing this is to lay a section of tape (a 5' or 10' section works well) in a sloping trough that collects the water and discharges it from the low end. You can make the trough from a length of PVC pipe (1½" or 2” works well) split in half lengthwise, or use a section of plastic rain gutter purchased from a hardware store. Add supportive feet to the trough so it will slope when placed on the ground, ensuring that water will flow out the lower end. Begin by letting the drip tape sit in the collection trough until the discharge is constant, about 30 seconds to a minute. To take a measurement, collect the discharge in a flat can (a tuna or cat food can, for instance) for a set period of time (say, 30 or 60 seconds) and then use a graduated cylinder to measure how much water you have collected. After you complete the measurement, move the apparatus to the next monitoring location.
For more information on “How to use drip tape pressure and discharge rate measurements”, click here.
